Setting up Mac Mail
Mail is the default email app on Mac OS. Here’s how to set it up for your email account. All screenshots shown are using Mac OS Mojave.
Add a New Account
If you’ve never used Mac Mail before, it should open to the new account screen. To add it as a secondary account, click the Mail menu (beside the Apple) and choose Preferences. Click the “plus” button at the bottom of the account list.
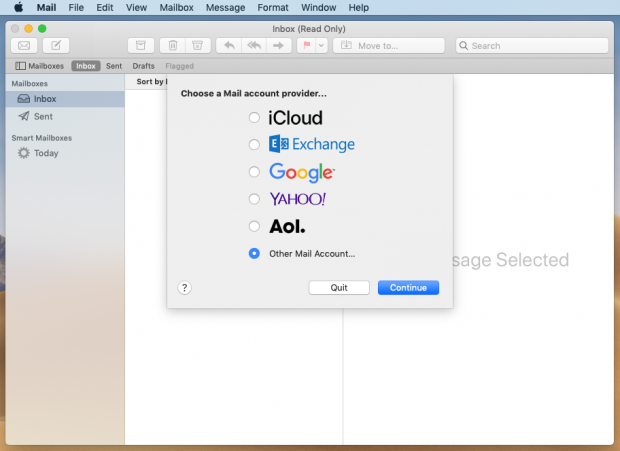
Step 1 – Choose a Mail account provider…
Choose “Other Mail Account”
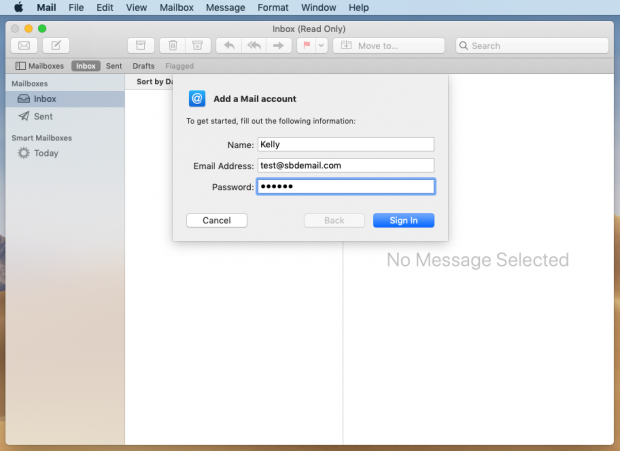
Step 2 – Add a Mail account
Enter your Name, Email Address, and Password as provided.
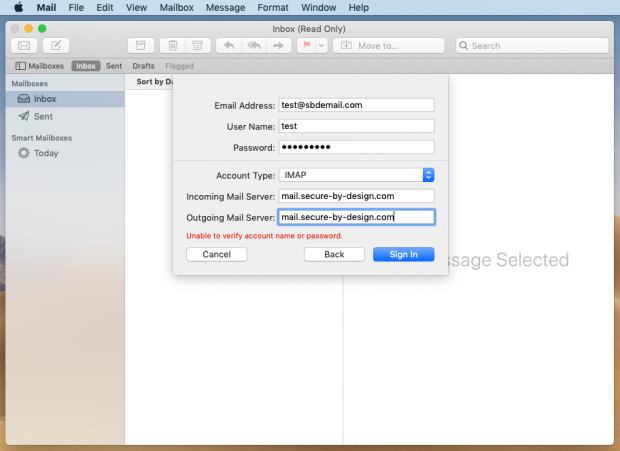
Step 3 – Server Type and Settings
Account Type: IMAP
Incoming Mail Server: mail.secure-by-design.com
Outgoing Mail Server: mail.secure-by-design.com
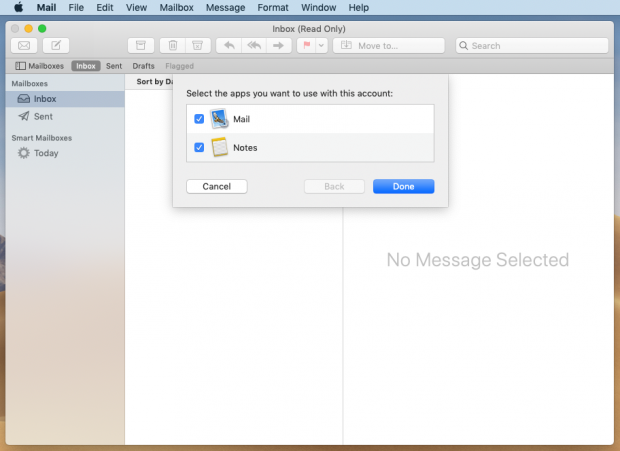
Step 4 – Click “Done”
Remove the check from “Notes” if you don’t want Notes to be saved as emails on our server.
Your email account is ready to use.
Check Your Settings
To verify that your account settings are correct, click the Mail menu (beside the Apple) and choose Preferences. Click on Accounts, if it’s not already active.
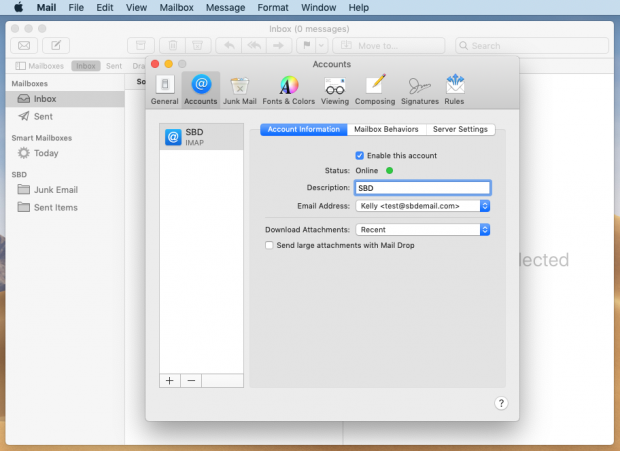
Account Information
For the Description, use whatever best describes this account. You could use Home for one account, or Work for another.
To change the Name and Email address, click the blue arrows and choose “Edit Email Addresses”
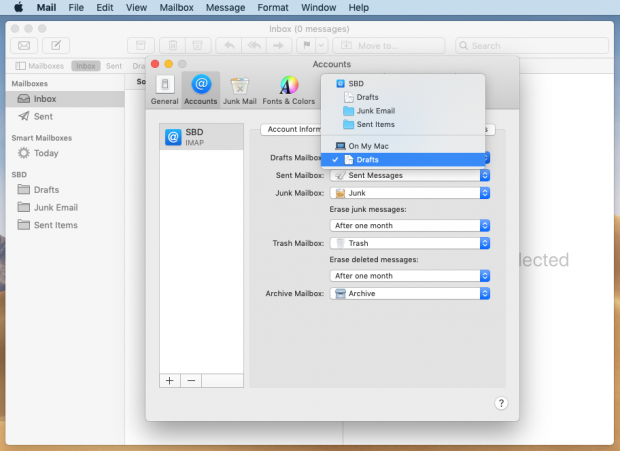
Mailbox Behaviors
One optimization step is to put your Drafts folder “On My Mac”. This saves space on the server, and is more efficient on slower internet connections.
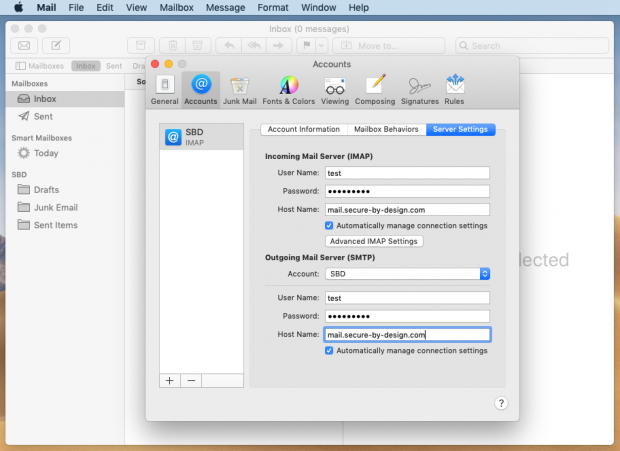
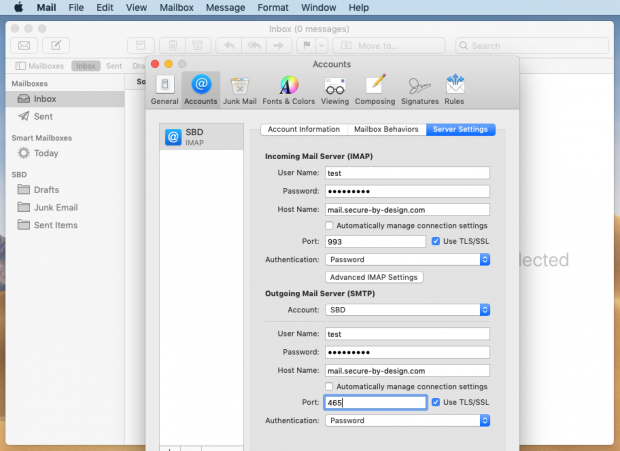
Server Settings
Check that your username and password are entered for both incoming and outgoing servers. Verify the server names and port numbers are correct.
